
The Comprehensive Knowledge Archive Network (CKAN, https://ckan.org/) is a web application that aims to facilitate storing and distributing datasets. CKAN annotates the data with the DCAT (Data Catalog Vocabulary) standard, making the data interoperable. Besides the user interface, CKAN also supports data access via API. As a result, CKAN complies with the FAIR principle that makes the data Find able, Accessible, Interoperable, and Reusable. This in particular makes it a perfect platform for public institutions and researchers to use as a data publishing portal.
One of the powerful features of CKAN is enabling the developers to customize the system by using Plugins. A CKAN plugin can add new features to the system and also customize the CKAN user interface. A CKAN plugin is wrapped inside a CKAN Extension. Multiple plugins can be part of one CKAN extension to customize many parts of the system at once. In this article, we go through the steps for developing a simple CKAN plugin. This article is based on the CKAN version 2.9 and higher. Plus, all the paths used here are based on CKAN default installation by source
CKAN application stack:
- Database: PostgreSQL
- Backend: Python-flask
- Frontend: Jinja2 + HTML/CSS/JS
- Search engine: Solr
- Testing: Pytest
Many of the steps explained in these writing series exist in the CKAN documentation (https://docs.ckan.org/en/2.9/extensions/index.html). However, here I aim to explain in detail with a more practical approach for developing a CKAN plugin.
In this article we see how to:
- Create a CKAN plugin
- Add logic to the plugin
- Define a URL route for the plugin with Blueprint
- Add a second plugin to our extension
The source code of this and future parts of this tutorial is here:
https://github.com/Pooya-Oladazimi/ckanext-my-first-cool-extension
Create a CKAN Plugin
As mentioned, to develop a CKAN plugin, first we need to create a CKAN extension. Each extension can contain multiple plugins at once. To create one, we use one of the CKAN CLI commands:
First we activate the CKAN python virtual env:
~$> source /usr/lib/ckan/default/bin/activateThen we create the target extension:
~$> ckan -c path/to/ckan.ini generate extension -o /usr/lib/ckan/default/src Note: the -o option is used to create the extension in the target directory. The ‘“src” directory is recommended for creating your new extension but it can be anything. If you do not set the path, it creates the extension by default in the “ckanext” directory in the CKAN core (/usr/lib/ckan/default/src/ckan/ckanext).
After running the above command, CKAN asks you for a couple of input fields for your new extension. Except for the extension name, the rest are not mandatory and can be set later in the setup.py. The extension name has to start with ckanext- . Let’s name our extension ckanext-my-first-cool-extension. After creating, you will see this message:

When you create a CKAN extension via CLI, it comes with a built sample plugin. Open the extension in your favorite IDE:
First you see this directory and files structure:
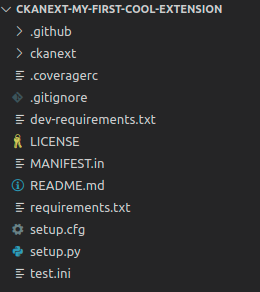
The important ones are:
- ckanext directory: contains all plugins source code in this extension
- requirement.txt: The python library needed by your plugins to run.
- setup.py: the extension and plugins configuration metadata.
- test.ini: the unit test configuration for your extension.
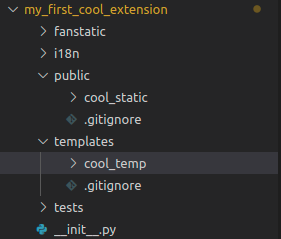
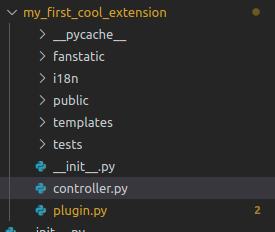
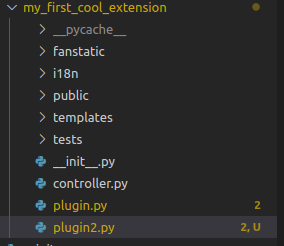
Now if you open the “ckanext” directory you will see this:
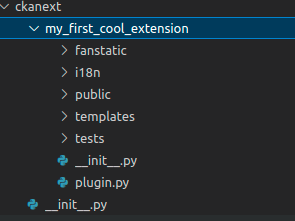
The root directory here is my_first_cool_extension. This is the same name we picked for our extension without ckanext- . All plugins and their source code have to be inside this root directory.
The directories inside the my_first_cool_extension can be shared and used by all plugins inside this extension (we see later how). The most important script here is the plugin.py. This is the running script for a CKAN plugin:
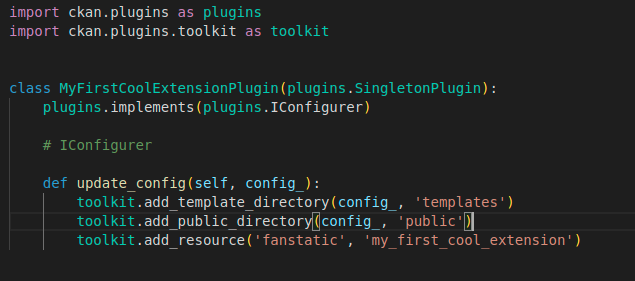
Notes:
- We always need to import plugins and toolkit from the CKAN core (we use toolkit most often)
- We also need to implement the IConfigurer interface to config our plugin.
- update_config(self, config_) is a function in IConfigurer interface that we have to implement for the plugin config
- add_template_directory(): a toolkit function to tell CKAN where are the plugin view templates (Jinja2)
- add_public_directory(): a toolkit function to tell CKAN where are the plugin public assets such as JS, CSS, and images.
- add_resource(): a toolkit function that helps us to add assets libraries for our plugin. We use this to create our WebAssets for CSS and JS assets.
As you can see, CKAN already picked a plugin class name for us. We can change it. We also want to change some other stuff. These are the changes we make:
- Change the plugin class name to “MyCoolPlugin”
- Change the template directory
- Change the template public
- Remove add_resource for now
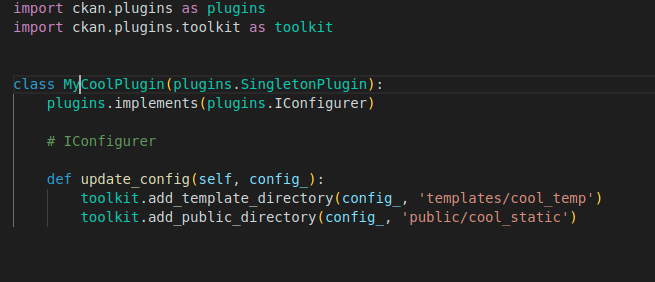
Note that now the root directory for our template and public assets are “cool_temp” and “cool_static”. When we use a template and assets later, CKAN looks into these directories to load them. So we need to also create them:
Now the next step is to tell CKAN what is our plugin name. Open the setup.py in the extension root directory. Scroll down to the end and you see this:
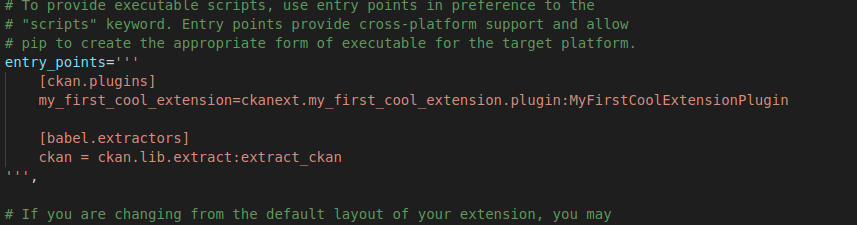
This is the part where we tell two things to CKAN:
- What is the plugin name?
- How can CKAN find the plugin script (class)?
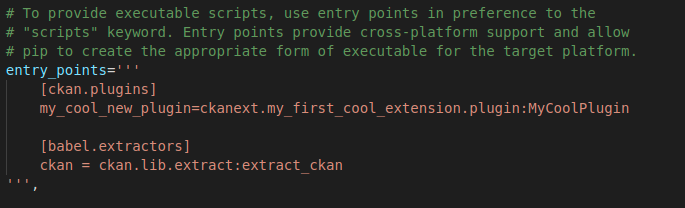
As we changed the plugin class name, we need some changes here. We also want to name our plugin my_cool_new_plugin (you can name it something else also)
Install and enable the plugin
To enable a CKAN plugin, we need to first install its extension. We can install our extension like this:
First we activate the CKAN python virtual env:
~$> source /usr/lib/ckan/default/bin/activate
Then, inside the extension directory run:
~$> python setup.py develop
Then enable the plugin in the CKAN config script ckan.ini (default location is /etc/ckan/default/ckan.ini). First, find this line and then add the plugin name (my_cool_new_plugin) to the end of the line (or anywhere else in the line):
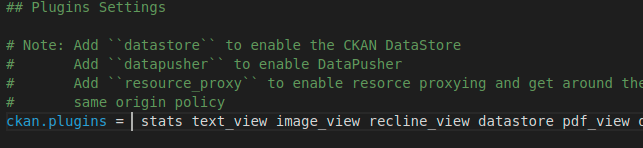
Now restart ckan (either via supervisor or the development server). If ckan starts without any problem, it means your plugin is successfully loaded!
Make your plugin do something
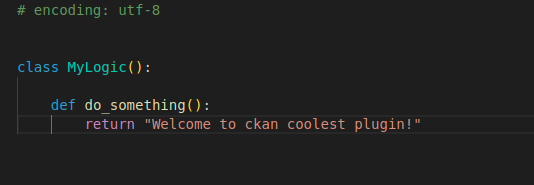
Until now, our plugin does not do anything. But usually, we want it to do something, right? So in this step, we want to add logic to it. We want our plugin to show “Welcome to ckan coolest plugin” when a user calls our plugin function.
We tend to define a function that returns the target string. You can define this function in plugin.py outside of our plugin class. However, to do it nicer, we define a new script name “controller.py” and implement our logic there. We wrap our new function in a class name MyLogic:
Now, the next step is to define a URL route for our new function. We need to enable our users to somehow call this function, right?
To define a route, we use flask Blueprint. In the flask framework, we can set runtime config for our application via Blueprint. Also, we use the blueprint interface in CKAN. The interface is an encapsulation for the flask blueprint that ables us to add new routing rules for our plugin. Plus we need also to import our logic class into plugin.py.
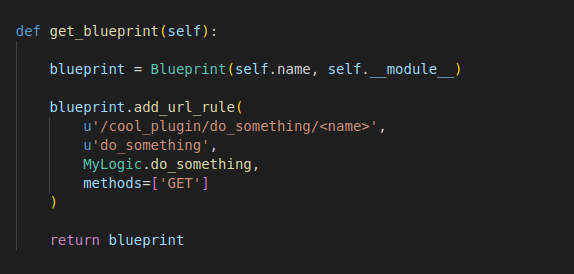
The final code would be:
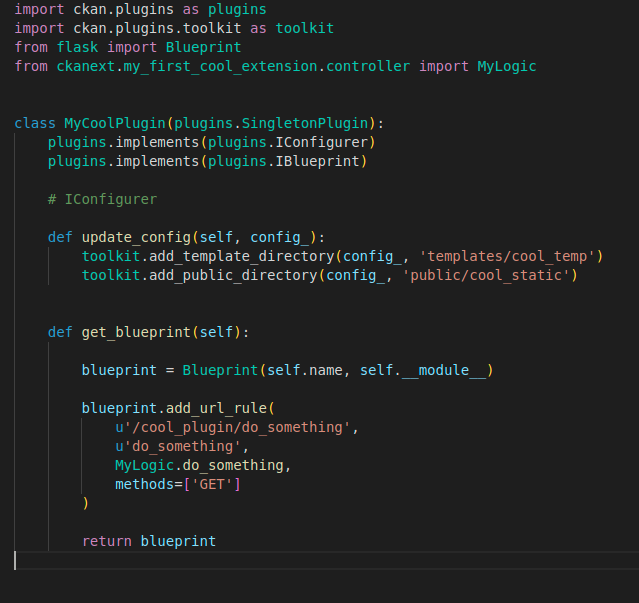
Points:
- The blueprint interface has the function “get_blueprint” that we use for adding the new URL rules.
- We need an instance from the Blueprint class in Flask.
- The Blueprint class in Flask has the function “add_url_rule” for defining our routing.
- The add_url_rule takes four parameters here.
- The first parameter is the actual routing rule (URL)
- The second is the function internal name. We can use this to access a function in CKAN via the helper function url_for (https://docs.ckan.org/en/2.9/extensions/plugins-toolkit.html)
- The third is the target function that we imported.
- The last parameter is the HTTP method.
Now if you open http://MY_DOMAIN/cool_plugin/do_something, you will see the message!
Make your plugin do something with user input
We saw together how to add logic to our plugin. Now we want to see how can we provide inputs for our plugin function.
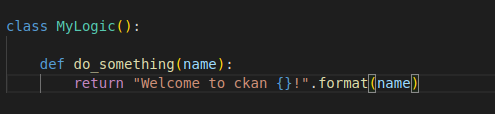
Currently, our plugin do_something function returns a string. Let’s change the returned string to accept a username. So if you:
- Call: “http://MY_DOMAIN/cool_plugin/do_something/John”
- Returns: “Welcome to ckan John!”
So we change our do_something function to get an input value “name”.
Now we need to change our URL route rule to accept the parameter “name”
Note: The URL parameter <name> has to match with the do_something parameter “name”. If it doesn’t, ckan raises an exception.
Now if you open http://MY_DOMAIN/cool_plugin/do_something/John you will see the message!

Add a second plugin
To add a second plugin, you need to create a new plugin script (just for sake of code separation) named plugin2.py
The rest of the steps are exactly like the first plugin. So first we create a plugin class:
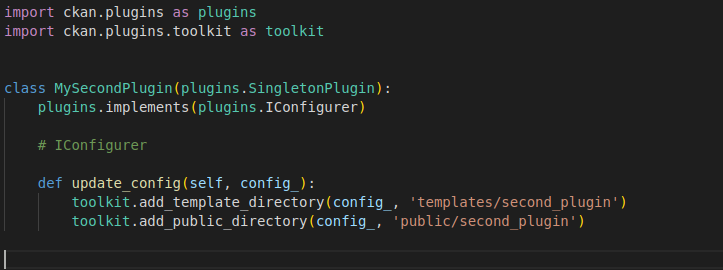
Note: We created a separate template and public root directory for this plugin. You need to create these directories also:

Then, we add the new plugin to the extension setup.py

Finally, you need to add the new plugin to your ckan.ini the same way you enabled the first plugin. Note that before enabling this plugin, you have to re-install the extension. Otherwise, ckan does not recognize it.
We finished the first part of developing a CKAN plugin! In the future article, we will see how can we implement a user interface for our plugin!
The code repo:
https://github.com/Pooya-Oladazimi/ckanext-my-first-cool-extension
The End.
Very nice.
Thanks.